Hosting Mastodon on DitialOcean
by Aaron Crowder on in SocialMast.xyz
I’ve been toying with the idea of setting up Mastodon on my own server for a while now. Today I finally got around to actually doing it (after a failed attempt a couple months ago). I found a guide that I loosely referred to and was immensely helpful at a couple points.
At first I tried running on a super small $5 instance, which seemed fine during setup, but died every few requests when I started using it. I ended up bumping the server up to the $15 a month plan (3GB RAM, single CPU core) and things seem to be working fine now. I’ll re-evaluate my plan if things start slowing down again.
I’m using docker to run Mastodon, so if you don’t want to do that you’ll have better luck with a different guide. I like Docker because it makes it easy to run the various things we need to run for Mastodon (SideKiq, PostgreSQL, etc.). It also makes updates easy, as you’ll see later on.
Okay, let’s get started!
Mailgun
First things first, let’s set up Mailgun. Most guides I read didn’t mention this until later in the guide, but it’s important to get this out of the way now. It could take some time to get it configured correctly and working, and you’re going to want it working properly when you get into actually setting up Mastodon.
To get started, head on over to Mailgun and sign up for a free account. For most people, you won’t need to upgrade your account to a non-free one. But even if you do (trust me, you likely won’t) it’s VERY affordable. Follow Mailguns instructions for configuring your domain for sending email through their platform.
Once you’re done make sure you take note of the SMTP username and password. You’ll need those later when you’re configuring Mastodon.
Create a Droplet

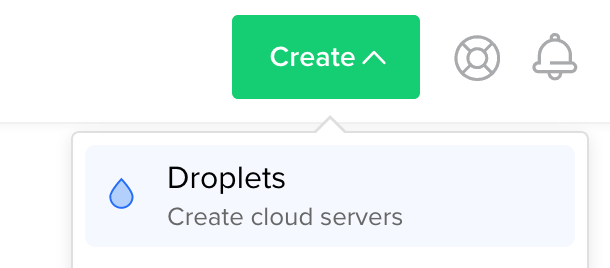
From you Digital Ocean dashboard click on “Create” and then “Droplet” to get started creating your Droplet. We’re going to use Ubuntu 18.04. Under “Size” and “Standard” pick the $15 a month option that has 1 CPU and 3GB of RAM.
Create your Space

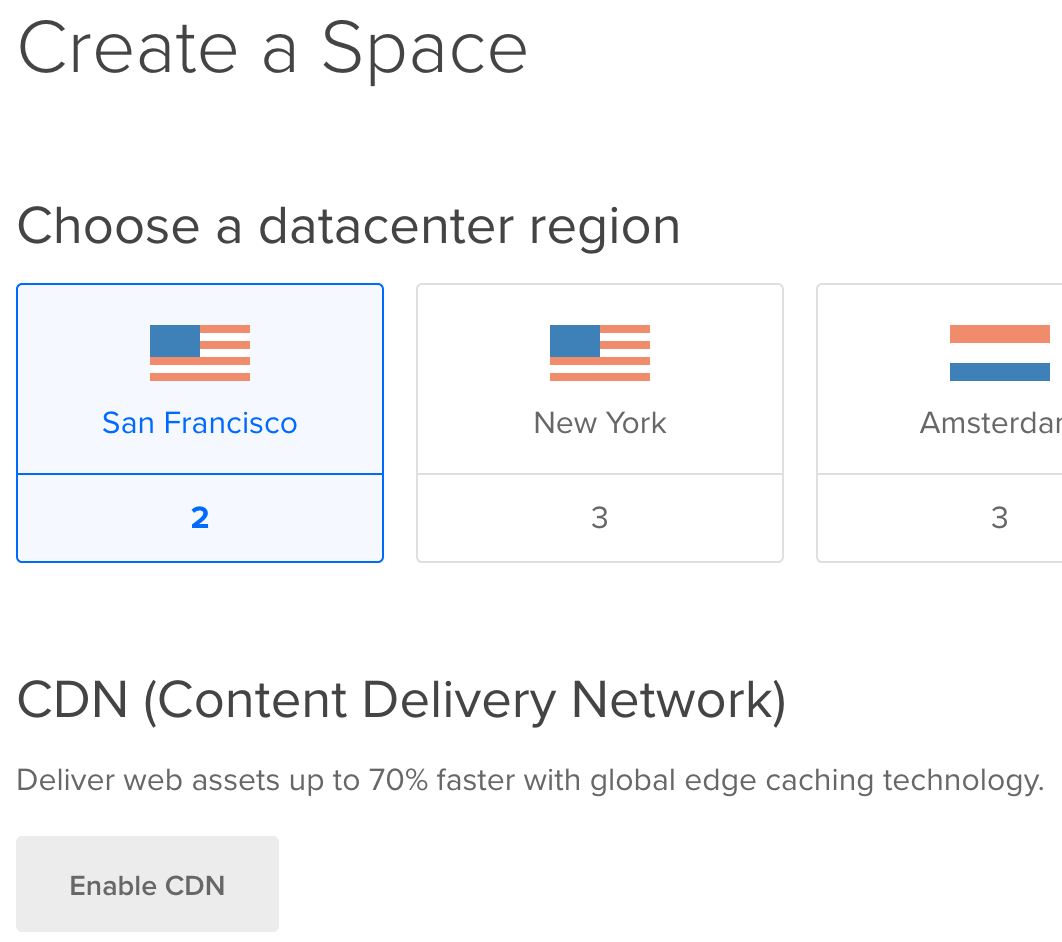
Digital Ocean has an Amazon S3 compatible storage solution. Mastodon can use this to store all media files. This will cost you less than block storage for your VPS and will reduce load / stress on your server as well.
The unique name you choose for you space is the “bucket name” that you’ll need for Mastodon. Make sure to make note of it for use later. The other thing you’ll want to make note of is the space endpoint:

Generate Space Access Keys
You’re going to also need some access keys so that Mastodon will be able to access your space. This is pretty easy to do. Just click on “API” in the sidebar to the left. Then “Generate New Key”, give it a name, and take note of the keys (especially the Secret key, as this is the last time you’ll be able to view it in the Digital Ocean UI).

VPC setup
Okay, now that we’ve got all that taken care of we’re going to actually start setting up our VPC. I’m going to assume that you know how to SSH into your server, so go ahead and do that.
Create a Mastodon User
First, let’s create a mastodon user:
adduser mastodon
Then, we’ll add the user to the sudoers group:
usermod -aG sudo mastodon
Finally, switch to this user:
su - mastodon
Install Docker
First, we need to add the GPG key for the official Docker repo:
curl -fsSL https://download.docker.com/linux/ubuntu/gpg | sudo apt-key add -
Then, well add the Docker repo to our apt sources:
sudo add-apt-repository "deb [arch=amd64] https://download.docker.com/linux/ubuntu $(lsb_release -cs) stable edge"
Then we’ll make sure that the system uses the Docker sources instead of the Ubuntu default:
sudo apt-cache policy docker-ce
Finally, let’s install Docker:
sudo apt-get install -y docker-ce
To check that the install was successful let’s check if it’s running:
sudo systemctl status docker
Install docker-compose
The best way to get the most up to date version of docker-compose is to
install it from Docker’s GitHub repository. Ubuntu’s official version is more
than likely to be several (or more) minor versions behind. Before running this
command, be sure to check the latest version on the releases page of the
GitHub repository. If there’s a newer version, update the command below
accordingly.
sudo curl -L https://github.com/docker/compose/releases/download/1.23.2/docker-compose-`uname -s`-`uname -m` -o /usr/local/bin/docker-compose
Next, we need to make this freshly downloaded binary executable:
sudo chmod +x /usr/local/bin/docker-compose
And now, check that all this worked:
docker-compose --version
Get / Build / Configure Mastodon
Now it’s time to get, build, and configure Mastodon. There’s going to be a need here to refer back to the noted information from before so make sure to have those notes ready.
Get Mastodon
Let’s make sure we’re in the right place first, then clone the Mastodon repo:
cd /home/mastodon
git clone https://github.com/tootsuite/mastodon.git
cd mastodon
Build
Now, before we actually configure Mastodon we need some secret keys to use. To do that we will build an unconfigured image and use it. Fair warning, this will take some time, so go get a cup of coffee while you wait.
docker-compose build
After that finishes you’re going to run this command 3 times, and save the secret key it generates each time.
docker-compose run --rm web rake secret
Configure
Let’s copy the sample config file to use as our production config file:
cp .env.production.sample .env.production
Go ahead and open up .env.production in your favorite editor. Populate
PAPERCLIP_SECRET, SECRET_KEY_BASE, and OTP_SECRET with your new keys.
Then, we need to update the following values:
# Shouldn't contain the protocol part of the domain
LOCAL_DOMAIN=<YOUR_DOMAIN>

# Email settings
SMTP_LOGIN=<MAILGUN_SMTP_LOGIN>
SMTP_PASSWORD=<MAILGUN_SMTP_PASSWORD>
SMTP_FROM_ADDRESS=notifications@<YOUR_DOMAIN>

# Media Storage (Spaces)
S3_ENABLED=true
S3_BUCKET=<BUCKET_NAME>
AWS_ACCESS_KEY_ID=<ACCESS_KEY>
AWS_SECRET_ACCESS_KEY=<SECRET_KEY>
S3_PROTOCOL=https
S3_HOSTNAME=<ENDPOINT_WITHOUT_BUCKET_NAME_OR_PROTOCOL> # (sfo2.digitaloceanspaces.com)
S3_ENDPOINT=<ENDPOINT_WITHOUT_BUCKET_NAME> # (https://sfo2.digitaloceanspaces.com)
Save those changes and close the file.
Build, Again
Now that our config has been updated we need to rebuild the docker image.
docker-compose build
Next we’ll run the migrations:
docker-compose run --rm web rails db:migrate
Then pre-compile the static assets:
docker-compose run --rm web rails assets:precompile
Now, let’s fire it all up:
docker-compose up -d
Install / Configure Nginx
We’re going to use Nginx to proxy requests to Mastodon for us. First, let’s install it:
sudo apt-get install nginx
Then, remove the default site config/symlink and create a new one for Mastodon:
sudo rm /etc/nginx/sites-available/default
sudo rm /etc/nginx/sites-enabled/default
sudo touch /etc/nginx/sites-available/mastodon
sudo ln -s /etc/nginx/sites-available/mastodon /etc/nginx/sites-enabled/mastodon
Now, let’s open up our Nginx config for Mastodon (located at
/etc/nginx/sites-available/mastodon) and replace it with the following
(making sure to replace <LOCAL_DOMAIN> with the same value you put in your
Mastodon config):
map $http_upgrade $connection_upgrade {
  default upgrade;
  ''      close;
}

server {
  listen 80;
  listen [::]:80;
  server_name <LOCAL_DOMAIN>;
  root /home/mastodon/live/public;
  # Useful for Let's Encrypt
  location /.well-known/acme-challenge/ { allow all; }
  location / { return 301 https://$host$request_uri; }
}

server {
  listen 443 ssl http2;
  listen [::]:443 ssl http2;
  server_name <LOCAL_DOMAIN>;

  ssl_protocols TLSv1.2;
  ssl_ciphers HIGH:!MEDIUM:!LOW:!aNULL:!NULL:!SHA;
  ssl_prefer_server_ciphers on;
  ssl_session_cache shared:SSL:10m;

  keepalive_timeout    70;
  sendfile             on;
  client_max_body_size 80m;

  root /home/mastodon/live/public;

  gzip on;
  gzip_disable "msie6";
  gzip_vary on;
  gzip_proxied any;
  gzip_comp_level 6;
  gzip_buffers 16 8k;
  gzip_http_version 1.1;
  gzip_types text/plain text/css application/json application/javascript text/xml application/xml application/xml+rss text/javascript;

  add_header Strict-Transport-Security "max-age=31536000";

  location / {
    try_files $uri @proxy;
  }

  location ~ ^/(emoji|packs|system/accounts/avatars|system/media_attachments/files) {
    add_header Cache-Control "public, max-age=31536000, immutable";
    try_files $uri @proxy;
  }

  location /sw.js {
    add_header Cache-Control "public, max-age=0";
    try_files $uri @proxy;
  }

  location @proxy {
    proxy_set_header Host $host;
    proxy_set_header X-Real-IP $remote_addr;
    proxy_set_header X-Forwarded-For $proxy_add_x_forwarded_for;
    proxy_set_header X-Forwarded-Proto https;
    proxy_set_header Proxy "";
    proxy_pass_header Server;

    proxy_pass http://127.0.0.1:3000;
    proxy_buffering off;
    proxy_redirect off;
    proxy_http_version 1.1;
    proxy_set_header Upgrade $http_upgrade;
    proxy_set_header Connection $connection_upgrade;

    tcp_nodelay on;
  }

  location /api/v1/streaming {
    proxy_set_header Host $host;
    proxy_set_header X-Real-IP $remote_addr;
    proxy_set_header X-Forwarded-For $proxy_add_x_forwarded_for;
    proxy_set_header X-Forwarded-Proto https;
    proxy_set_header Proxy "";

    proxy_pass http://127.0.0.1:4000;
    proxy_buffering off;
    proxy_redirect off;
    proxy_http_version 1.1;
    proxy_set_header Upgrade $http_upgrade;
    proxy_set_header Connection $connection_upgrade;

    tcp_nodelay on;
  }

  error_page 500 501 502 503 504 /500.html;
}
Save and close this config.
HTTPS Thanks to Let’s Encrypt
Setting up an SSL cert so we can use HTTPS is essential. Thankfully this is
easily accomplished using certbot to get an SSL cert from Let’s Encrypt. You
first must add the PPA for certbot:
sudo add-apt-repository ppa:certbot/certbot
sudo apt-get update
Then install it:
sudo apt-get install python-certbot-nginx
Next, let’s stop Nginx:
sudo systemctl stop nginx.service
Then use certbot to obtain and configure our cert for use with Nginx:
sudo certbot --nginx -d <LOCAL_DOMAIN>
Run Mastodon (for real this time)
Okay, we’re getting close to the end! Now, we’re going to shut down Mastodon running in docker, rebuild the image, recompile the assets, and rerun migrations making sure that nothing fails before bringing everything back online:
docker-compose down
docker-compose build
docker-compose run --rm web rails assets:precompile
docker-compose run --rm web rails db:migrate
docker-compose up -d
Now, if all that worked go ahead and start Nginx back up:
sudo systemctl restart nginx.service
If all went according to plan you should be able to open up your domain in your web browser and see your Mastodon instance! Go ahead and create and account and make sure you can do some basic things like edit your profile, upload a picture, etc.
Make your user an Admin
Once you’ve played around with Mastodon a bit let’s get back in the command line and make your user an Admin so you can administer your instance.
docker-compose run --rm web ./bin/tootctl accounts modify <YOUR_USERNAME> --role admin
You should see something like the following:
Starting mastodon_redis_1 ...
Starting mastodon_db_1 ... done
OK
If so you can go to https://<YOUR_INSTANCE>/admin/dashboard and check out
what’s available to you as an admin. Something I would strongly encourage you
do is close registrations until you’re sure you want other people to register
on your instance freely.
Conclusion
Whew! You made is this far! If if all worked you now have a VPS in DigitalOcean running Mastodon on docker. All your media is being stored in S3 compatible Spaces. And you’re part of the fediverse!
If it all worked for you give me a shout, I’m @CrowderSoup@socialmast.xyz. If not, leave a comment with where things went wrong!